> Available types of badges in Eventure
Advanced options
Customize Badge Layout
On this page you can find more info about the following topics:
> Use the field tool in the badge
> Draw a line in the badge
> Add a text in the badge
> Center the text in the field of a badge
> Draw an ellipse in a badge
> Create a rectangle in a badge
> Colour the fields in a badge
> Change the font of the text
> Add a picture or logo in the badge
> Select fields in the badge design
> Capitals on a badge
Click on the links for more info about the following topics:
> Add an event on the badge
> Add a coloured field in my badge, one for each category
> Change the margins of the badge from inches to centimeters
> Add a field and 'Print when' option on the badge
> Change the size of the badge
> Change badge design of the butterfly badge
Barcodes on Badges
> Install the font for the barcode
> Add the barcode 1D on the badge
> Add 2D barcode on the badge
> Add the QR code on the badge
> Print a badge
> Print two the same badges for a participant
> Print two different badges for a participant
Use the field tool in the badge
With the ‘Field Tool’  you can add fields from the database.
Draw a rectangle/square with the field tool, after which the 'Expression Builder - Field Expression' screen will open (see example below).
Fields: All the database fields available to display on your badge
Functions: Available general functions for the badge
Variables: The variables filled by Eventure
You can also change the layout of the field. Do this by clicking it with the right mouse button. After that, a menu will appear with border, background, font and alignment options.
With ‘Field Style’ you can change the value of the field.
Draw a line in the badge
To draw lines in a badge, select the ‘Line Tool’  . The pointer changes into a ‘+’ sign.
Click in the badge where you want the line to originate and drag it to the place where you want it to end.
To edit the line, click with the right mouse button on the line. A menu appears. By selecting ‘Line Style’ you can change the thickness and the colour of the line. With ‘Set Position/Size’ you can change the position, length and direction of the line.
Add a text in the badge
You can use the ‘Text Tool’  for adding text. You can make a textbox in the same way as the rectangle and you can type the text immediately in the textbox.
Using the pointer tool, you can resize the textbox as explained in the ‘pointer tool’ section. You can change the layout of the textbox in the same way as the field layout mentioned before.
Center the text in the field of a badge
To center the text in the field, use your right mouse button on the field and select ‘Text Align’. Then select ‘Center’.
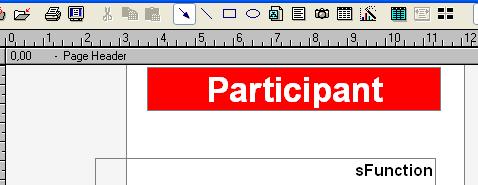
Draw an ellipse in a badge
To draw an ellipse, you have to use the ‘Ellipse Tool’  . The settings are the same as for the line.
If you want to place the ellipse in the background and a field in the foreground, use CTRL+B.
Create a rectangle in a badge
For making a rectangle please select the ‘Rectangle Tool’  . You can make the rectangle in the same way as drawing a line.
To edit the rectangle, click with the right mouse button on the rectangle. A menu appears. If you select ‘Border Style’ you can change the border and the colour of the border. With ‘Background’ you can edit the background of the rectangle and with ‘Shadowing’ you can make a shadow off the rectangle.
If you want to place the retangle in the background and a field in the foreground, use CTRL+B.
Colour the fields in a badge
In this part we will colour the field in a badge. This depends on the category of the participant.
In the example the following categories will be used:
Category 1 = Participant
Category 2 = Press
Category 3 = VIP
- Create a text field with the text ‘Participant’.

- Click with the right mouse button on the field and choose background. Now you can change the colour of the field to for example red.
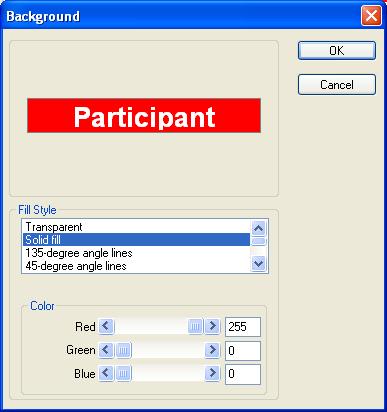
- You can colour the background via Solid fill.
- You can set the colour with the scroll bars in the lower part of the screen.
Change the font of the text in the badge design
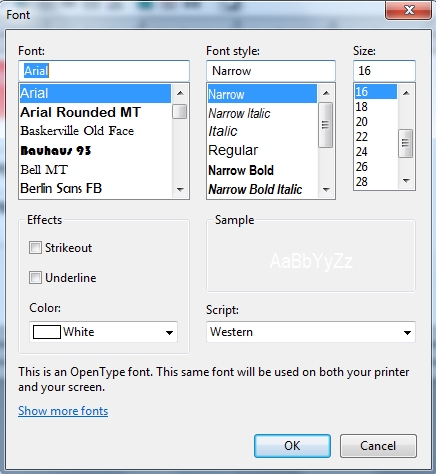
Click on the right mouse button and choose 'Font'
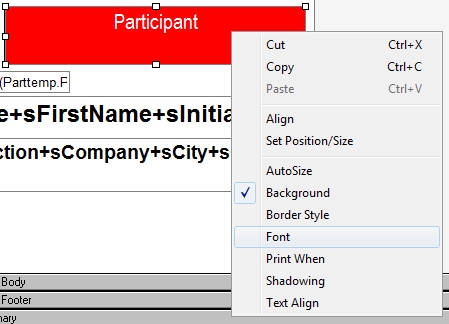
For example, you can change the text color white.
Add a picture or logo to the badge
With the ‘Picture Tool’  you can add a picture or logo.
You can only use the following formats:
Bitmapfiles (*.bmp) JPG-format (*.jpg)
PCX-format (*.pcx) PNG-format (*.png)
TGA-format (*.tga).
Click on the place you want to insert the picture and drag it to the point where you want to end it.

After dragging a box with the picture tool, you see the ‘Picture Style’ screen.
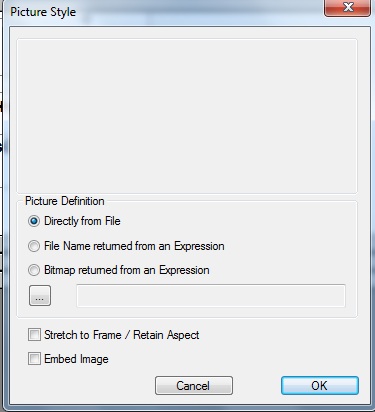
Select ‘Directly from File’ in the upper part of the screen. In the lower part you have the  button. When you click on that button, you can browse to the folder where your picture/logo is stored.
When you click on 'OK', you will see an example of how it looks.
Select fields in the badge design
The ‘pointer tool’  is selected as default.
With the pointer tool you can select fields by one click on the field. Squares will appear on the field.

You can enlarge or reduce the field by clicking on one of the squares and drag the field bigger or smaller.
To move the field you can select it and drag it to the right place. You can also use the arrows of your keyboard.
Move more than one field
If you want to move more than one field, hold the shift key and click all the fields you want to move. All fields are marked with squares and you can move them all at once. You can also select multiple fields by dragging a box with your left mouse button. The fields inside that box are selected.
Capitals on a badge
To show fields in capitals you can add the following code to the badge design:
Upper(FIELDNAME)
The badge desgin will look like this:
The result will look like this:

Comments
0 comments
Please sign in to leave a comment.